2. Setup the application
Now you are ready to load all your VCF files and start to analyze your data with myVCF.
myVCF is designed for human annotated VCF files, but it accepts any type VCF coming from different species with or without annotations.
For more information about not-annotated or non-human VCF file, please follow this link
myVCF manages annotated VCF files with specific fields that are mandatory in order to load and visualize the data correctely.
To verify if your .vcf file is compatible with myVCF, please read the following section.
2.1. VCF fields and requirements
myVCF can read VCF files deriving from Annovar or VEP annotation systems. These software are the most common tools used for VCF annotation after the SNP calling step.
Note
If you are not sure if your VCF file respect the mandatory field and requirements, try to load it by following the Load new data section
Let’s define which are the mandatory fields that a VCF must contains for myVCF
- Since myVCF is a tool to browse and visualize mutations genotyped with NGS technologies, the VCF file must contain at least 1 genotyped sample
See example below:
...
##contig=<ID=17,length=81195210,assembly=b37>
##contig=<ID=18,length=78077248,assembly=b37>
##contig=<ID=19,length=59128983,assembly=b37>
##contig=<ID=20,length=63025520,assembly=b37>
##contig=<ID=21,length=48129895,assembly=b37>
##contig=<ID=22,length=51304566,assembly=b37>
##contig=<ID=X,length=155270560,assembly=b37>
##contig=<ID=Y,length=59373566,assembly=b37>
##contig=<ID=MT,length=16569,assembly=b37>
##INFO=<ID=Func_ensGene,Number=.,Type=String,Description="Func_ensGene annotation provided by ANNOVAR">
##INFO=<ID=Gene_ensGene,Number=.,Type=String,Description="Gene_ensGene annotation provided by ANNOVAR">
##INFO=<ID=GeneDetail_ensGene,Number=.,Type=String,Description="GeneDetail_ensGene annotation provided by ANNOVAR">
##INFO=<ID=ExonicFunc_ensGene,Number=.,Type=String,Description="ExonicFunc_ensGene annotation provided by ANNOVAR">
#CHROM        POS     ID      REF     ALT     QUAL    FILTER  INFO    FORMAT  Sample1
1     762273  rs3115849       G       A       123.7   LowQual AC=2;AF=1;AN=2;Func_ensGene=ncRNA_exonic;Gene_ensGene=ENSG00000225880;GeneDetail_ensGene=.;ExonicFunc_ensGene=. GT:AD:DP:GQ:PL  1/1:0,63:63:99:1550,188,0
This is part of a VCF file in which one sample has been genotyped (Sample1) for one mutation.
For Annovar annotated VCF files, the mandatory fields would be:
- Gene_ensGene
- ExonicFunc_ensGene
For VEP annotated VCF files, the mandatory field would be:
- CSQ
This field is added by default during VEP annotation
Note
To verify the necessary fields for the annotation part, you should see in the HEADER part of the VCF file the following lines:
# Annovar fields
##INFO=<ID=Gene_ensGene,Number=.,Type=String,Description="Gene_ensGene annotation provided by ANNOVAR">
##INFO=<ID=ExonicFunc_ensGene,Number=.,Type=String,Description="ExonicFunc_ensGene annotation provided by ANNOVAR">

# VEP: CSQ field
##INFO=<ID=CSQ,Number=.,Type=String,Description="Consequence annotations from Ensembl VEP. Format: Allele|Consequence|IMPACT|SYMBOL|Gene|Feature_type|Feature|BIOTYPE|EXON|INTRON|HGVSc|HGVSp|cDNA_position|CDS_position|Protein_position|Amino_acids|Codons|Existing_variation|DISTANCE|STRAND|VARIANT_CLASS|SYMBOL_SOURCE|HGNC_ID|CANONICAL>
or copy the VCF in myVCF/data/VCFs/ directory and try to load the VCF through the Upload page
2.2. How to annotate your VCF
If you don’t have the genomic/transcript annotation for your VCF file, or the VCF is not suitable for myVCF please consider to annotate it using the following instructions.
2.2.1. How to install the annotation tools
2.2.1.1. Annovar
The installation of Annovar is very well-described on ANNOVAR Manual pages
Since Annovar is a perl script, the software can be run on different operating systems including Unix and Windows.
2.2.1.2. VEP
The installation of VEP is described on VEP main page
Please follow the instructions below to install the software based on your operating system.
Unix (Ubuntu/Debian system)/MAC
For UNIX/MAC users, there is a tutorial available that describes the download and the installation steps in a simple manner.
Windows
Please follow these instuctions to install and configure VEP for Windows.
Note
The easiest way is the Cygwin installation procedure.
2.2.2. Launch the code for annotation
Here we reported the minimum code to run a correct annotation thai is compatible with myVCF. The tutorial contains both the Annovar and VEP annotation procedure.
For Windows users please launch the commands using Cygwin downloaded in the previous section or CMD shell (find CMD)
2.2.2.1. Annovar
- Download the ENSEMBL transcript reference database required for myVCF compatibility.
# Download the ensembl DB (example: hg19)
# buildver = hg19/hg38 depending on what reference assembly you used during the read mapping
table_annovar.pl -downdb -webfrom annovar -buildver hg19 ensGene

## Optional but useful annotation
# dbSNP147
table_annovar.pl -downdb -webfrom annovar -buildver hg19 avsnp147
# dbnsfp30a - non-synonimous variants annotation compendium (it takes lot for download)
#http://annovar.openbioinformatics.org/en/latest/user-guide/filter/#ljb42-dbnsfp-non-synonymous-variants-annotation
table_annovar.pl -downdb -webfrom annovar -buildver hg19 dbnsfp30a
- Launch the annotation process. The command line is based on Annovar tutorial.
# Launch the annotation
table_annovar.pl example/ex2.vcf humandb/ -buildver hg19 -out myanno -remove -protocol ensGene,avsnp142,dbnsfp30a -operation g,f,f -nastring . -vcfinput
Note
To download additional databases to enrich the annotation for your mutations, please see this link and modify the Launch the annotation command line by adding the name of the database in -protocol and an f in -operation for every database you want to add.
2.2.2.2. VEP
A simpler approach than Annovar, can be to use the following command. Once downloaded the tool and the human assembly containing the annotations, launch this command to annotate your VCF file
perl variant_effect_predictor.pl -i example.vcf --cache --force_overwrite --vcf -o example_VEP.vcf
At the end of the process you will have file named example_VEP.vcf with all the information suitable for myVCF
2.3. Load Data
In myVCF package there are two annotated VCF files that you can use for a trial run. This can be done by loading these files directely from the myVCF upload page by clicking on the dropdown menu VCF File:
- mini_annovar.vcf (annotated with Annovar)
- mini_vep.vcf (annotated with VEP)
These files reported ~ 1000 mutations in 80 samples and they are stored in /path/to/myVCF/data/VCFs
- Copy/move the VCF files you want to load into myVCF in
/path/to/myVCF/data/VCFs - Launch the application (See how to launch the app) and load http://127.0.0.1:8000/ in your browser
- Click on the Upload new project link in the myVCF homepage
- Give a name to the project and select the VCF to load
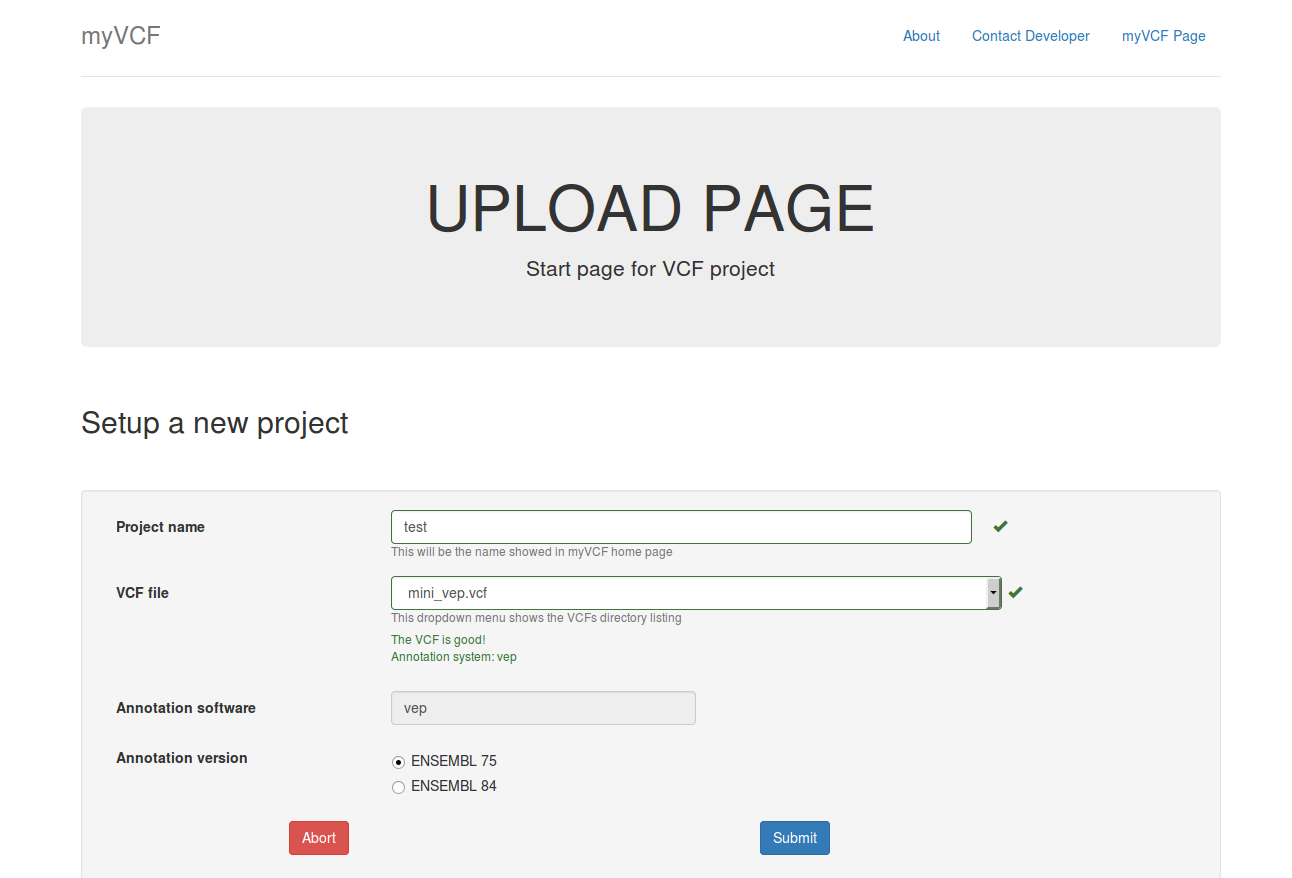
New project upload page example. mini_VEP.vcf is the mutation file to upload into test project using ENSEMBL75 as the transcript reference.
Note
If you don’t find your VCF in the dropdown menu, please verify that you have copied the file into the directory myVCF/data/VCFs and restart the application
- Click on submit button for saving the project
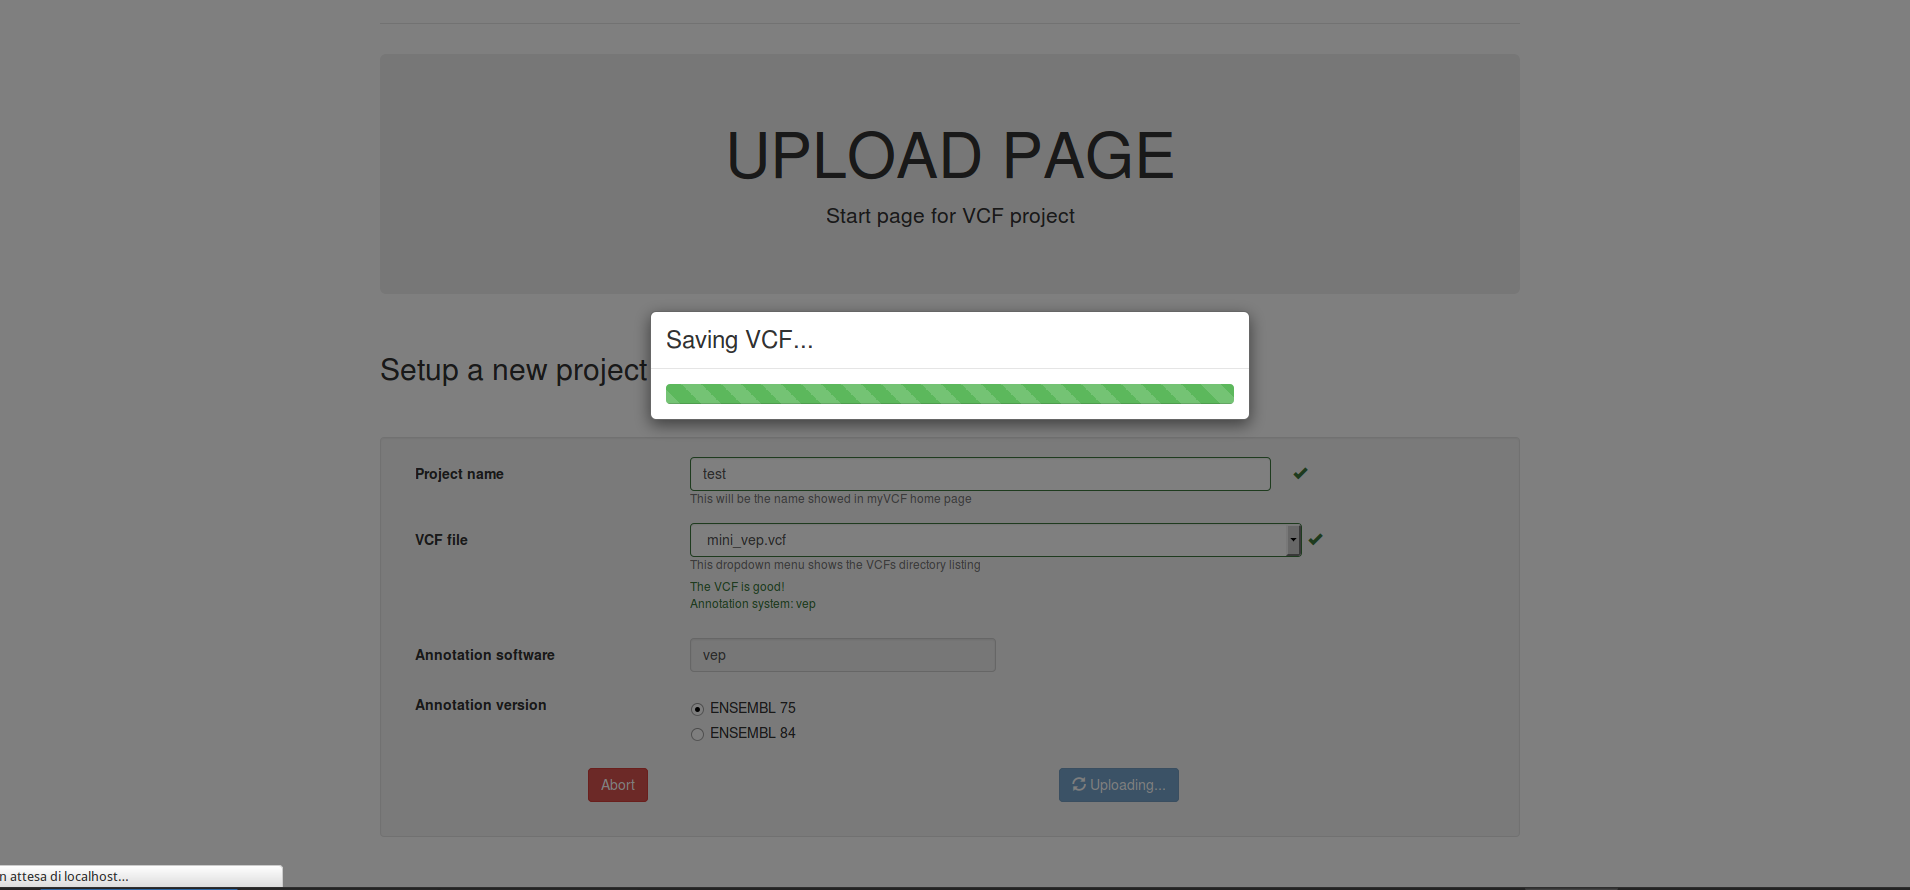
The storing process of very large VCF files (above 50 MB) will take a long time.
Warning
Don’t panic if the saving process takes very long time. Do NOT refresh the page until the Upload completed page will appear.